What is Docker?
Docker is a set of platform-as-a-service products that use OS-level virtualization to deliver software in packages called containers. Containers are isolated from one another and bundle their own software, libraries, and configuration files; they can communicate with each other through well-defined channels.
It is a platform as a service (PaaS) offering that utilizes the host OS Kernel as opposed to hypervisors like VirtualBox.
The containers contain the dependencies and libraries that the application or service needs to run, therefore eliminating the need for installing dependencies manually.
Docker containers are much more efficient than VMs as they utilize the host kernel.
Prerequisites & Requirements
In order to secure Docker containers, you need to have a Linux server with the following services running:
- Docker
Note: This demonstration has been performed on Ubuntu 18.04; all techniques demonstrated are distribution agnostic with the exception of package names and package managers.
Host Security
The security of the host kernel and operating system will have a direct correlation to the security of your containers, given the fact that the containers utilize the host kernel. It is therefore vitally important to keep your host secure. The following steps outline various security best practices you should consider when securing your Docker host:
- Secure and harden your host OS.
- Ensure your host is kept updated.
- Ensure you have the latest version of Docker running.
- Consider the use of minimal Linux distributions that offer a much smaller threat surface.
- Add your host and containers to a robust vulnerability management plan and constantly scan your host and containers for vulnerabilities.
- Only run the services you need to run.
- Ensure your kernel is up to date.
- Keep up with the latest vulnerability news for the Linux kernel and the Docker platform
Using an unprivileged user
Running containers with an unprivileged user will prevent privilege escalation attacks. This can be done by following the outlined steps below:
- Always reconfigure and build your own Docker images; this way, you can customize the various security parameters to your specification.
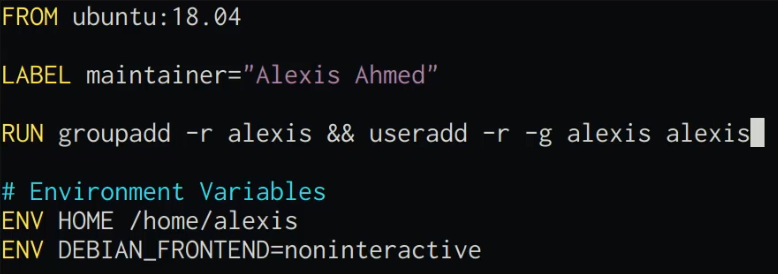
- To run a Docker container as an unprivileged user, this needs to be specified in the Dockerfile before building the image. This can be done by adding the following command to the Dockerfile:
RUN groupadd -r <user> && useradd -r -g <group> <user>
3. This will add the user to the Docker image, and you can now run the container with the unprivileged user instead of running it with the default “root” user. This can be done by running the following Docker command in the terminal:
docker run -u <user> <IMAGE-ID>

Disabling the “root” user
As an added security measure, we can disable the “root” user by modifying the Dockerfile:
We can disable the “root” user by changing the default shell from /bin/bash to /usr/sbin/nologin. This will prevent any user on the container from accessing the “root” account, regardless of whether they have the “root” password.
This can be done by adding the following command to the Dockerfile:
RUN chsh -s /usr/sbin/nologin root
This configuration is only applicable if you want to disable the “root” account completely.
Preventing privilege escalation attacks
It is recommended to run your containers with specific permissions and ensure that they cannot escalate their privileges.
We can prevent privilege escalation through the exploitation of SETUID binaries by using the following flag when running containers:
docker run --security-opt=no-new-privileges <IMAGE-ID>
Limiting container capabilities
Linux kernel capabilities are a set of privileges that can be used by privileged containers; however, it is always recommended not to run containers with the “–privileged” flag. Giving privileged access to a container will usurp any other user permissions and security restrictions you have set.
You can change and drop the capabilities required to harden your Docker containers, or you can add some capabilities.
We can drop all kernel capabilities by running the following command:
docker run --cap-drop all <IMAGE-ID>
You can also add the specific kernel capabilities required by your containers by running the following command:
docker run --cap-drop all --cap-add <CAPABILITY> <IMAGE-ID>

Filesystem permissions and access
You also have the ability to specify filesystem permissions and access; this can allow you to set up containers with a read-only file system or a temporary file system. This is useful if you would like to control whether your containers can store data or make changes to the filesystem.
We can run containers with a read-only file system by running the following command:
docker run --read-only <DOCKER-ID>

If your container has a service or application that requires the storage of data, you can specify a temporary file system by running the following command:
docker run --read-only --tmpfs /tmp <DOCKER-ID>
Disabling inter-container communication
Given the notion of virtual machine isolation, we can also isolate Docker containers from one another. This will prevent them from communicating with each other.
This can be helpful if you want to isolate a particular Docker container. By default, Docker does not isolate containers, and as a result, they can communicate with each other.
In order to disable inter-container communication, we will need to create a new Docker network. This can be done by running the following command with the “icc” option set to false.
docker network create --driver bridge -o “com.docker.network.bridge.enable_icc”=”false” <NETWORK-NAME>
We can now run the container that we want to isolate with the following command:
docker run --network <NETWORK-NAME>